|
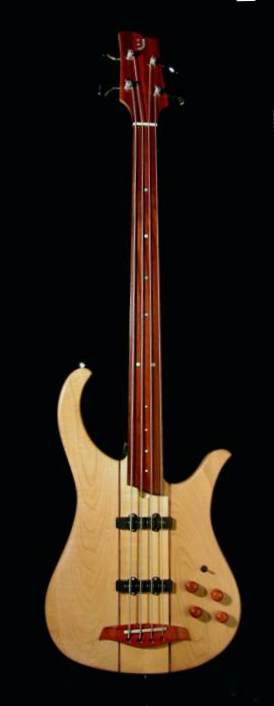
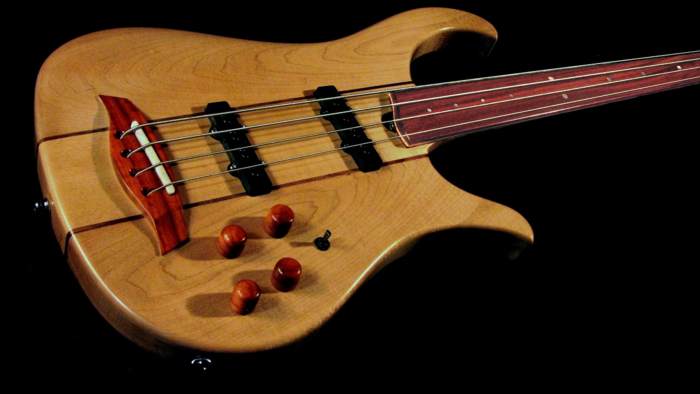
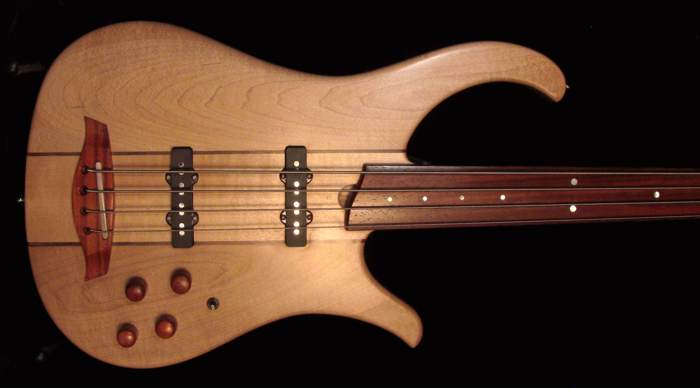
Neck: 2-pce
full length maple... scarf head angle joint.
|
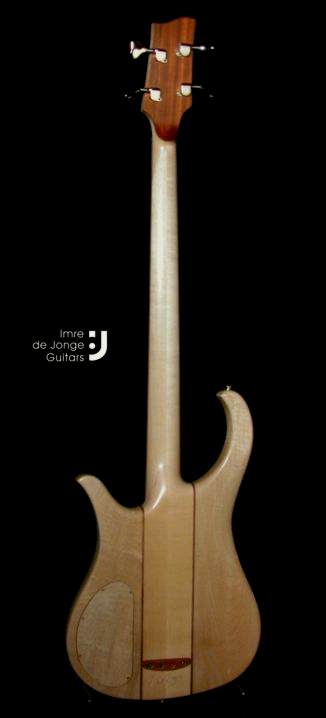
Body:
2 pce maple |
|
Neck width @
nut: 42.5 mm Thickness: 23 mm
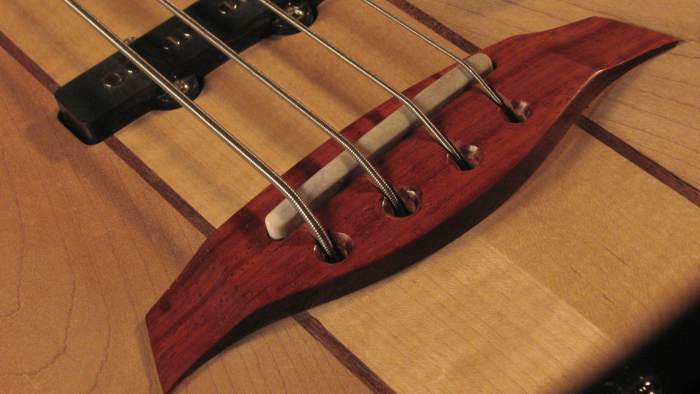
Bridge: padouk
String spread
at bridge: 56 mm
|
Scale length:
33.3 inches
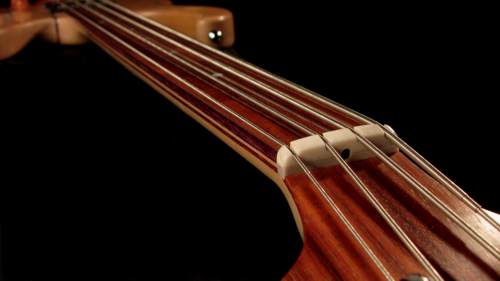
Nut & Saddle:
Deer antler
|
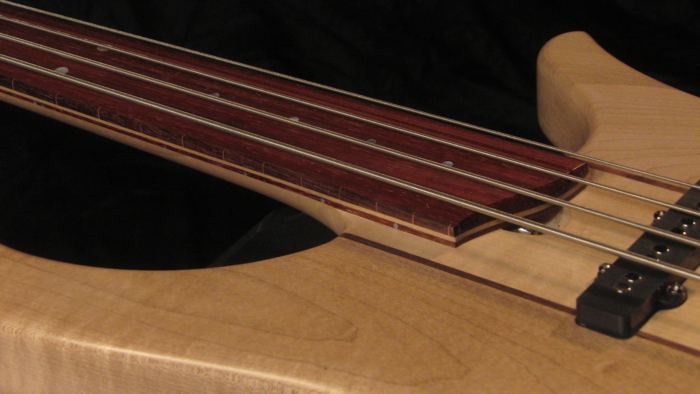
| Fingerboard:
padouk-maple-padouk with rosewood binding, pearl edge & face dots,
cherry veneer edge fret markers |
String
anchor: 5 mm grounded aluminum block with 7 mm padouk overlay. |
|
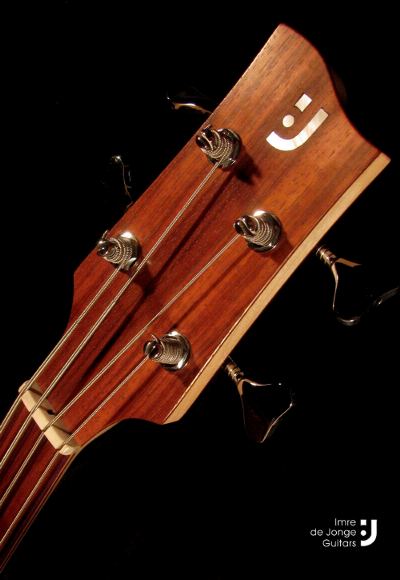
Tuning machines:
Schaller
Strap studs:
Schaller straplocks
|
Strings: D'Addario half-round reg. light |
|
Shielding:
full; aluminum, galvanized steel, or copper sheet on mounting deck,
foil adhesive tape on side walls.
|
Cover plate:
maple laminated to sheet copper/aluminum/galvanized steel
Jack: barrel
type; bolt-in
|
|
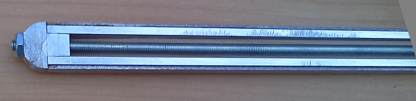
Truss rod: full
length of my own design and construction; adjusts at the body to keep
the nape at the head as strong as possible. This design uses a flat
3/4" wide x 1/8" thick aluminum U-channel double side-walled
for rigidity,and is tensioned into a bend by a 3/16" steel rod
running through it, anchored at the string nut and tightened with a
Strat bullet nut in the heel. The entire assembly is silicone-filled
to eliminate rattle or vibration.
|
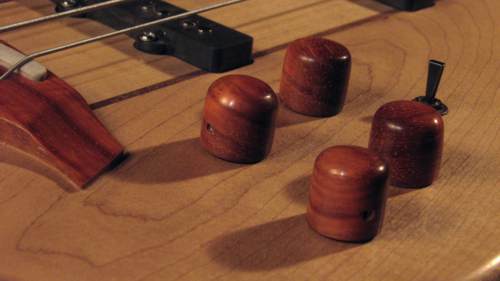
Electonic controls:
2 volume,2 tone,3-pos. pickup selector mini switch. All pots are linear
taper
|
This is the truss rod I made for this bass. Note the two1/8" sidewall
reinforcements, and the solid pressure blocks capping each end.
|
Finish
There is no finish on this bass; not even oil. No maintenace is required,
other than occasional re-polishing areas that become dull. To brighten
up the wood, all that is required is to buff it with very fine sandpaper
(800 grit or finer) and / or very fine steel wool (000), followed by
some buffing with polishing compound on a cloth. Minor scratches &
nicks can be smoothed out this way, and restored to a nice shine. For
the polishing compound I reccomend Turtle Wax , which is available in
most hardware/automotive stores.
You can add any good quality wood wax or oil if you wish, but I personally
don't recommend it on the back of the neck or fingerboard, since materials
like that can become gummy with play and slow down the neck speed and
possibly get onto the strings. If the back of the neck gets a little
gummy or dirty, buff it lengthwise with fine steel wool. You can follow
that with rubbing compound if you want, but I find steel wool leaves
it slightly faster. (but not as glossy)
Bear in mind that the colour of the instrument will darken over time,
as the wood builds a patina from exposure to light and air. This happens
with a finish too, but it will be more pronounced and rapid without
one. The maple will yellow with age, and any repairs done to damage
will appear lighter. The padauk is quite bright reddish orange when
cut but darkens deeply over time. You may notice that already the fingerboard
is darker than the bridge; this is due to the fingerboard being cut
much longer ago than the bridge, and a bit surprisingly, not all of
its patina sanded out.
|
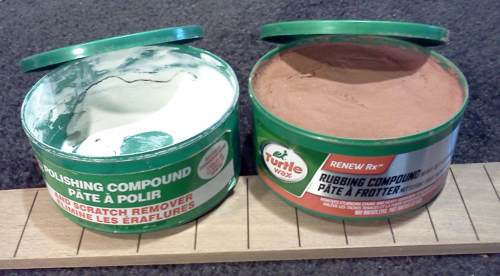
The orange "rubbing compound" is their course, fast compound,
and the white "polishing compound" is much finer, for a higher
gloss. The orange compound is adequate to restore the shine on this
bass. It contains oil, and that penetrates the wood somewhat. CAUTION:
don't let the bass rest on crumbs of this stuff, or let crumbs lie on
it. It will cause an oil-stain spot that's virtually PERMANANT, and
impossible to blend out. ALWAYS CHECK for wayward crumbs before you
put the bass down! (I'm serious!)
On the non-porous MAPLE body & neck. the compound can be applied
wet or dry from a clean cloth, but don't let wet compound stagnate on
the bass... keep it moving & spreading. Spread some compound on
the cloth and buff the wood as the compound dries until you've removed
all the compound from the surface and it and it begins to shine. Finish
with plain cloth. Dried compound worked into your cloth is a great quick
buff-up tool, and I like to keep this in my guitar case. They last virtually
forever, occasionally I top them up with a little fresh compound.
|
 |
CAUTION
Padauk is an extremely POROUS wood, as you can
see by the picture at left. Anything you rub on the surface will get
into the pores, and it's pretty hard to get it out! The course red compound
isn't as bright against the padauk, but the white stuff is dangerous.
The picture shows what happens when you polish this with inadequately
STAINED compound. The goal isn't really to match the wood colour, but
just to make the pores DARK, and unobtrusive. Black will do just fine,
so if you polish the padauk with compound, blacken it first
I tried india ink stirred into the compound,
but after a while it seemed to lose its colour, and the white of the
Turtle Wax again dominated. All black ink is actually extremely dark
red, so it's not true, permanant black. The best thing to use
would be black paint pigment (from any paint dept.) or VERY finely ground
charcoal. Mix it thoroughly through some compound until it is BLACK,
through & through. If it becomes too thick to mix easily, add a
little water.
|
Neck & adjustment
Due to its lack of finish, this bass may be slightly more reactive
to humidity changes. Padauk is an extremely stable wood, reacting or
warping very little with humidity change, but maple not so much. I would
expect in high humidity the maple will expand more than the padauk,
which would bend the neck forward, and in low humidity exactly the opposite.
These effects are likely to be miniscule, but both can be corrected
by adjusting the truss rod. Tighten it to straighten out or bow the
neck backward; (against the string tension) loosen it to allow the strings
to pull the neck forward (with the tension). You can sight down the
neck to guage its straightness (do this from both ends) and adjust the
rod so there's the subtlest of forward bow. Ultimately, how the bass
plays and sounds will determine the best adjustment, and some trial
& error is involved. It's not necessary to loosen the strings. DON'T
over-tighten the truss rod; when turning the nut becomes difficult,
you're nearing the limit.
BEST THING is not to let the bass dry out too much. Dryness causes
wood to shrink, and that can cause cracking, as the wood literally pulls
itself apart. Wetness causes swelling, but that doesn't pose nearly
the danger, since it won't cause cracking. Below a relative humidity
of 30% there is a risk, and keeping a moisturizer in the case or a humidifier
in the room is necessary, same as you would treat an acoustic guitar.
Average median humidity is 50%, and that is the ideal, and the conditions
under which my guitars are built.
|
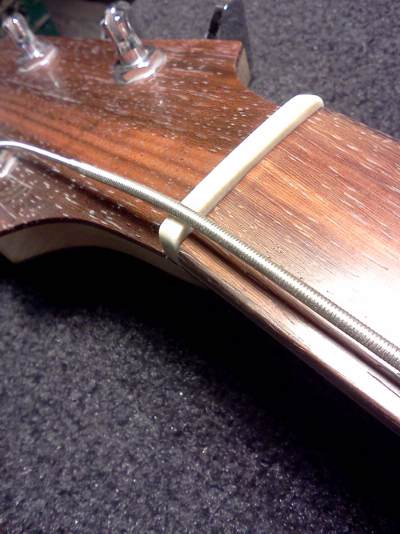
Fingerboard
The bass is strung with D'Addario half-round strings, for smoother
quieter slides and longer fingerboard wear. If you choose round-wound
strings, the windings will wear into the fingerboard much more, and
more frequent sandings will be required. This should be preferably done
by a competent luthier or service person, or better yet, me. It's not
rocket science, but any sanding on that should only be done with a long,
dead-straight hard block, and I would not start courser than 320 grit,
depending on how deep the wear is. The thing about sanding is, if you
start too course, you spend a lot more time sanding out those marks
as you grade up. If you start at a higher grit, it takes longer to sand
out the wear, but you're not left with any deep scratches from course
papers... you're done, and ready to polish. When I dress frets or a
fretless board I prefer to start around 400-600 grit, and finish with
800 or 1000.
I sand a slight down-slope in the 2nd octave, mainly on the bass side,
to accomodate the string movement at lower positions; this should be
maintained
|
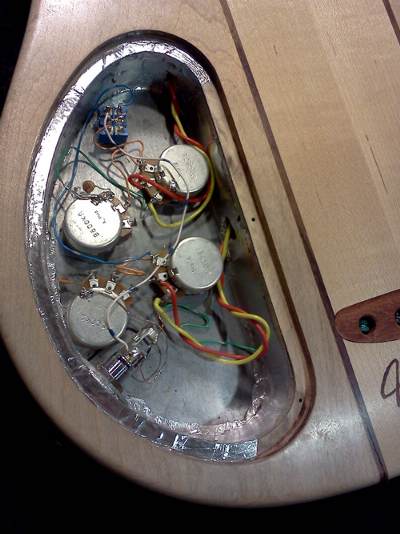
Electronics
The electronics are entirely passive; no battery is required. Each
pickup is on its own volume & tone control; there is no overall
(master) volume control.
Over time the controls ("pots"short for potentiometers) may
become somewhat noisy as the resistive element wears or becomes dirty.
My favorite thing for cleaning electronic cpmtrp;s is WD40, but there
are other specialized materials for this also. To get it into the pots,
you'll have to remove the back cover. With a straw nozzle bent, spray
a small amount into the opening (behind the contacts) and turn the pot
back and forth. If a cleaning like this doesn't solve the problem, the
pots may need to be replaced.
I used 250K LINEAR TAPER pots for the volumes, and 500K for the tones.
My preference is always linear 'B' taper, rather than "audio"
or 'A' taper, which have an exponential rather than a consistent effect
as they're turned. This is a preference; any suitable 250K to 1 MEG
pots will do.
If the selector switch becomes noisy or sloppy, it will have to be
replaced. These things don't last forever, and really aren't serviceable.
If any components become loose, please use a socket wrench to tighten
them, to avoid marring the surrounding wood. For the pots you'll need
to remove the knobs, and open the cavity so you can hold them in position
as you tighten the nut. If you don't hold them, they can rotate and
either contact something they shouldn't, or strain one of the connections.
Tightening the nut on the mini switch is tricky; again, a LONG socket
is needed to do it safely. IF you need to use pliers for this, put tape
on the jaws facing the guitar so the inevitable slip won't be a disaster.
Hold the switch body to prevent it from turning too much, and to leave
it at the angle you prefer.
When replacing the knobs you'll need to fudge the knob on the pot shafts
until they tighten at the right height and rotate evenly. DON'T OVER-TIGHTEN
THE SET SCREWS!
If you need to replace a knob, just email
me and I'll send you a new one for free.
|
|
|
|
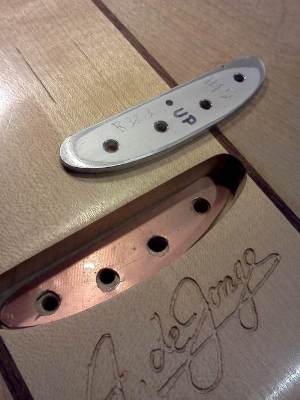
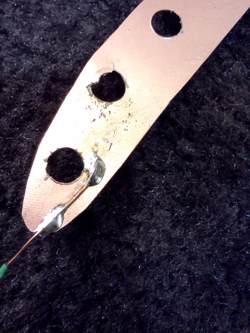
If the bass ever becomes prone to humming when your fingers are removed
from the strings, the ground connection to the strings may have become
faulty. This connection is through a piece of copper foil pinned underneath
the string anchor. If, with an ohmmeter or other tester it shows to
have a good connection between the strings and any other part of the
ground circuit, (pot bodies, jack body, or shielding foil & plate)
then the problem isn't the bass. You may have some building ground
faults, which can often be improved by by-passing the ground pin on
the power plug. If the tester shows no connection between the strings
and ground, check the wire coming from the bridge and make sure it's
securely connected. If so, you'll need to check the other end. Remove
the string anchor cover (1 screw) and loosen the strings until you
can lift the anchor plate up and inspect the groundconnector underneath.
If undamaged, simply re-positioning it may solve the problem. If the
foil has separated from the wire it's soldered to, it will need to
be re-soldered.
|
|
Pickups: The pickups are screwed down into their sockets over
a foam rubber cushion. This works as a spring to allow the pickup to
sit securely at any height. To vary the angle of the pickup, just loosen
or tighten the screws. I found (this is true of basses in general) that
the treble strings were more pronounced thatn the bass side, so an angling
down away from the treble side is desireable.
The pickups supplied are standard GFS J-bass copies; single coil. Because
single coil pickups are prone to picking up interference in a myriad
of forms, the bass will be noisier in some locations than others. They're
quite directional, though, and I find turning my position even a little
can make a big difference. Many companies now make that form factor
in a humbucking configuration, should you find interference levels to
be unacceptable where you are.
OPTIONAL
There is ample room under the antler saddle for an acoustic piezo pickup,
and room in the control cavity for extra controls or pre-amp.
|
Tuners: These are sealed tuners that require little to no maintenance.
Occasionally the button tension will work loose. Just tighten the screws
that hold the buttions on, but not too much; you'll find the tuner stiff
to operate if you do. Every year or so a few drops of light oil can
be applied to the bass of the string shafts to keep the gears lubricated.
Always tune AGAINST the string tension, in other words, UP, never down.
If your string goes sharp you have to start over from flat! This is
true of all instruments with geared tuners, because there is a slight
amount of play between the gears that the strings will pull out if the
grears aren't engaged against the tension, and your string will slip
down. Most people who complain their guitars won't stay in tune simply
don't tune correctly.
|
 Imre de Jonge Guitars